

Learn about our time-saving superbill
Based on great feedback from our user community, we built a new superbill to save you time and a new billing section so you can easily manage existing bills. In addition to the new superbill features highlighted below we’re also adding back in previous Dx codes and frequently-used CPT codes soon, so you can use these time-saving tools in our new billing workflow.
To make a new superbill, go to the Charting shortcuts from a chart note and click Create a superbill. Please note that a patient record number (PRN) must be recorded in the Basic section of a patient’s chart to ensure that bill export and integration work correctly.
From the superbill screen, you can add a CPT code and a Dx code, as well as new modifiers. All of these will auto-complete so you can instantly find the specific CPT codes, modifiers and diagnoses you are looking for. You can also set the date range, units and charge for the procedure, as well as add additional procedures to the single bill by clicking Add another procedure.
To finalize a note, you can add a note, set a ‘Paid’ amount (the balance will automatically calculate), and print, export or set the status of the bill. Setting the status of a bill will send it to the new billing section, where your biller or staff can process the bill accordingly:
Incomplete: Not yet ready for your staff or biller to process
Ready to review: Ready for your staff or biller to process
Billed: Processed by the staff or biller
To find the new billing section, go to Reports then Billing, where you will see a list of superbills you have created. You can filter by the status of the bill and double click on any bill to edit it.
From the superbill, you can also Export a HL7 file that will soon be able to be imported into existing practice management systems. We are working to allow desktop billing systems to easily connect with us so you can export superbills electronically into your existing system.
If you are looking for a more complete billing solution, we have also just partnered with CollaborateMD and Nuesoft, who will offer a full integration through Practice Fusion in 2-3 months. Stay tuned for more details!
Insurance updates
We’ve also made your EHR insurance workflow more comprehensive for your practice’s needs and integrated with your new superbilling workflow!
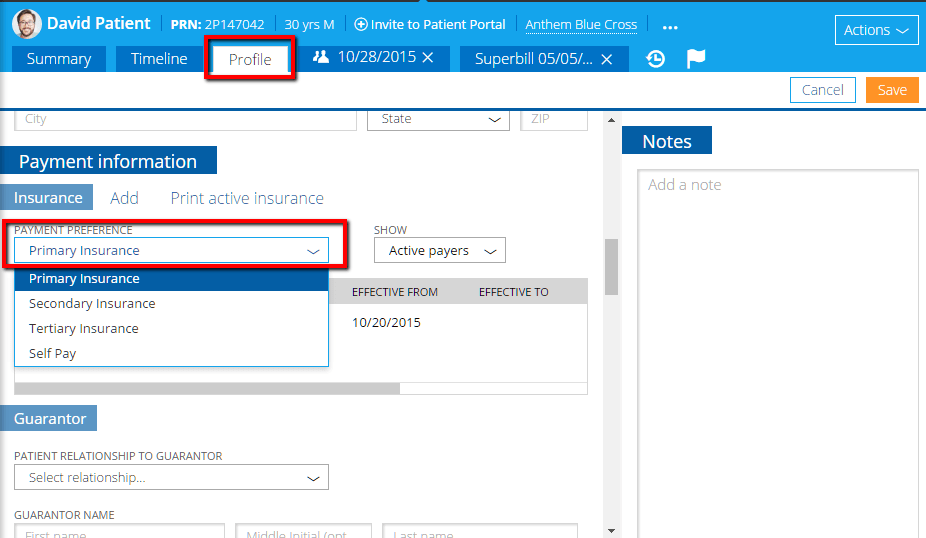
You can automatically set a default payment preference that will automatically populate in your superbills by clicking Edit at the top of the Insurance section of a patient’s chart. From this same Edit screen, you can also set a guarantor for the patient.
To add insurance from a patient’s chart, click Add at the top of the Insurance screen, where you can now specify a separate plan name. Fill out the rest of required information and, if you wish, select ‘Go to advanced edit?’ to set advanced insurance options such as subscriber information.
To restrict your patient insurance choices to your practice payer list, click on the settings gear in the top right, then go to Practice > Payer list, and click Restrict patient insurance to this list. You now can add information like copay amount, claims contact and attorney contact by double clicking existing payers in your list.